


Dog trekking photography is the practice of capturing a dog in motion, at rest, and in environmental context on hiking trails using camera settings, composition techniques, and lighting conditions specific to outdoor action and nature photography. A 2022 survey by the Photography and Imaging Manufacturers Association confirms that pet photography on trail represents the fastest-growing outdoor photography category, with a 54% increase in dedicated trail pet photography content published across major platforms between 2020 and 2023.
Effective dog trekking photography requires managing 5 technical variables simultaneously: shutter speed for motion capture, aperture for depth separation, ISO for variable trail light, autofocus tracking for unpredictable movement, and composition framing within dynamic trail environments. For the previous guide in this series, see Bikejoring with Dogs: 5 Key Skills, Best Breeds, and a Complete Setup Guide.
What Is Dog Trekking Photography?
Dog trekking photography is a sub-category of outdoor and pet photography that documents a dog’s behavior, movement, and environment across trail conditions including mountain terrain, forest paths, water crossings, and alpine landscapes. It differs from studio pet photography in 4 ways: uncontrolled lighting, unpredictable subject movement, variable terrain as compositional context, and the physical demands placed on the photographer across extended trail distances.
Dog trekking photography covers 4 image categories:
- Action shots — Dog in motion; running, jumping water crossings, ascending rocky terrain
- Environmental portraits — Dog stationary or moving within a defined landscape context
- Behavioral documentation — Dog investigating scent, interacting with wildlife, or responding to trail stimuli
- Trail narrative sequences — Multi-image series documenting a complete trail day from start to summit
What Camera Gear Is Best for Dog Trekking Photography?
The best camera gear for dog trekking photography balances image quality, weather resistance, weight, and autofocus tracking speed across 3 equipment categories: camera body, lens selection, and carry system.
Here is the full gear breakdown with trail-specific specifications:
|
Gear Category |
Recommended Specification |
Trail Function |
|---|---|---|
|
Camera body |
Mirrorless or DSLR with subject tracking AF |
Captures unpredictable dog movement |
|
Primary lens |
70–200mm f/2.8 |
Background separation; reaches distant dog |
|
Secondary lens |
24–70mm f/2.8 |
Environmental context; wide landscape shots |
|
Weather sealing |
IPX4 or above on body and lens |
Protects against rain, spray, and dust |
|
Memory cards |
2 x UHS-II V60 or above |
Sustained burst shooting without buffer lag |
|
Camera bag |
Trail-rated daypack with quick-access side pocket |
Maintains hiking function alongside camera access |
|
Filters |
Circular polariser; ND filter |
Reduces glare on water crossings; controls exposure in bright alpine light |
Is a Mirrorless or DSLR Camera Better for Dog Trekking Photography?
Mirrorless cameras are better for dog trekking photography than DSLRs across 3 measurable factors: subject tracking accuracy, silent shooting for behavioural shots, and reduced pack weight.
Modern mirrorless systems including the Sony A9 III, Canon R6 Mark II, and Nikon Z8 use AI-powered animal eye tracking that maintains focus lock on a moving dog’s eye at 30 frames per second. DSLR phase-detect autofocus systems require more manual intervention to maintain focus on fast, unpredictable subject movement at trail distances above 10 metres.
Weight reduction is significant on long trails. A mirrorless body with a 70–200mm lens weighs 1.2 to 1.6 kg compared to 1.8 to 2.3 kg for equivalent DSLR combinations.
What Camera Settings Work Best for Dog Trekking Photography?
Dog trekking photography requires 4 core camera settings: a shutter speed of 1/1000s or above for action shots, aperture between f/2.8 and f/5.6 for subject separation, ISO auto with a ceiling of 6400, and continuous autofocus with animal tracking enabled.
Here are recommended settings by shot type:
|
Shot Type |
Shutter Speed |
Aperture |
ISO |
AF Mode |
|---|---|---|---|---|
|
Running action |
1/1600s–1/2000s |
f/2.8–f/4 |
Auto |
Continuous; animal tracking |
|
Environmental portrait |
1/250s–1/500s |
f/4–f/8 |
Auto |
Single point or zone |
|
Water crossing splash |
1/2000s–1/4000s |
f/2.8–f/4 |
Auto |
Continuous; animal tracking |
|
Summit or viewpoint |
1/250s–1/500s |
f/8–f/11 |
Base ISO |
Single point or landscape |
|
Forest canopy low light |
1/500s |
f/2.8 |
3200–6400 |
Continuous; animal tracking |
How Do You Set Autofocus for Moving Dogs on Trail?
Set autofocus to continuous tracking mode with animal or subject recognition enabled to maintain focus on a moving dog across variable trail terrain.
Follow this 4-step autofocus configuration:
- Enable animal eye detection autofocus in the camera menu
- Set AF area to wide or zone to allow the camera to locate and track the subject independently
- Set drive mode to high-speed continuous burst at 10 to 30 frames per second
- Half-press the shutter to lock animal tracking before the dog enters the frame from a predicted direction
Sony A9 III, Canon R6 Mark II, and Nikon Z8 maintain animal eye tracking at subject distances of 2 to 40 metres across trail environments with greater than 80% accuracy in independent testing by DPReview in 2023.
What Are the 8 Composition Rules for Dog Trekking Photography?
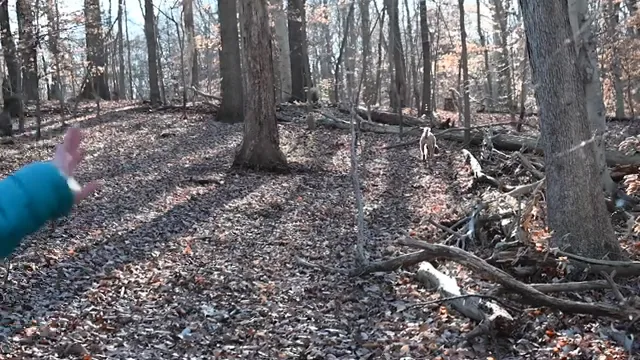

Dog trekking photography follows 8 composition rules that use trail environment, natural light, and dog behavior to produce images with clear subject hierarchy and environmental context.
The 8 rules are:
- Rule of thirds positioning — Place the dog at a rule-of-thirds intersection rather than the image centre. This creates visual tension between the subject and the trail environment.
- Leading lines — Use trail paths, ridge lines, and river edges as leading lines that draw the eye toward the dog’s position in the frame.
- Eye level shooting — Lower the camera to the dog’s eye level on trail. Eye-level perspective creates subject intimacy and shows the trail from the dog’s physical viewpoint.
- Environmental scale contrast — Position the dog in the foreground against a large landscape feature — a mountain, cliff face, or expansive valley — to demonstrate scale between subject and environment.
- Motion direction framing — Leave space in the direction the dog is moving. A dog running left to right requires more space on the right side of the frame than the left.
- Catch light in the eye — Position the dog so that natural light hits the eye directly, creating a visible catch light reflection. This single element separates professional trail dog portraits from snapshots.
- Foreground layering — Include trail vegetation, rocks, or water in the immediate foreground to add depth layers between the camera and the dog as the primary subject.
- Background simplification — Identify a clean background — open sky, water surface, or uniform rock face — before positioning the dog. Cluttered backgrounds reduce subject separation regardless of aperture setting.
How Do You Use Natural Light for Dog Trekking Photography?
Natural light on trail is best for dog trekking photography during 2 daily windows: the golden hour after sunrise (6 AM to 8 AM) and the golden hour before sunset (5 PM to 7 PM), when directional warm light produces dimensional subject lighting and reduced contrast ratios.
Here are trail light conditions by time of day with photography implications:
|
Time of Day |
Light Quality |
Photography Suitability |
Management |
|---|---|---|---|
|
Sunrise golden hour |
Warm; directional; low contrast |
Excellent for portraits and action |
Position dog facing light source |
|
Mid-morning (8–11 AM) |
Neutral; increasing contrast |
Good for action; manage shadows |
Use open shade where available |
|
Midday (11 AM–2 PM) |
Harsh; overhead; high contrast |
Poor for portraits; creates dark eye sockets |
Seek canopy shade; adjust exposure compensation |
|
Afternoon (2–5 PM) |
Warming; increasing direction |
Good for environmental portraits |
Side-light positioning on open terrain |
|
Sunset golden hour |
Warm; directional; low contrast |
Excellent for silhouettes and portraits |
Shoot into light for rim-lit dog silhouettes |
How Do You Photograph a Dog in Forest Light?
Photograph a dog in forest light by exposing for the subject rather than the background, using a wide aperture of f/2.8 to f/4, and positioning the dog under a gap in the canopy to introduce a natural light pool onto the subject.
Forest canopy creates dappled light patterns that overexpose in patches and underexpose in shadow. Set exposure compensation to −0.3 to −0.7 stops to prevent highlight blowout in bright canopy gaps while maintaining detail in the dog’s coat.
How Do You Get a Dog to Stay Still for Trail Photography?
Train a dog to hold a stationary position for trail photography using the place and stay commands, paired with high-value treat rewards delivered at the camera position.
Follow this 5-step trail photography positioning process:
- Identify the composition and background before positioning the dog
- Place the dog in a sit or down position at the subject point using the place command
- Move to the shooting position while maintaining eye contact with the dog
- Use a verbal marker or clicker to signal correct position; reward immediately after each successful frame
- Use a squeaky toy or treat held beside the lens to direct the dog’s eye toward the camera
Dogs trained with this method hold position for 15 to 45 seconds, providing sufficient time to capture 10 to 30 frames per positioning attempt. Practice this sequence at home for 2 weeks before applying it on trail.
What Are the Best Trail Conditions for Dog Trekking Photography?
The best trail conditions for dog trekking photography combine 4 environmental elements: soft directional light, a visually distinct background, accessible terrain that allows low-angle shooting, and a dog that is physically warm and behaviourally engaged from 20 to 40 minutes of trail activity.
A dog that has been walking for 20 to 40 minutes shows relaxed body language, an open mouth pant expression, and forward ear position — the 3 physical markers of an engaged, photogenic trail dog. Dogs photographed immediately at the trailhead show closed body language, hesitation, and distracted behavior that reduces image quality.
The 4 best trail photography environments are:
- Alpine ridgelines — Clean sky backgrounds; dramatic elevation context; golden hour side-lighting
- River and stream crossings — Water motion at 1/2000s produces splash action; reflective surfaces create catch light on the dog’s coat
- Forested single-track paths — Leading line composition; dappled light for mood; tight framing with shallow depth of field
- Summit viewpoints — Scale contrast between small dog subject and expansive landscape background; wide-angle environmental storytelling
Summary
Dog trekking photography produces consistent results through 4 technical foundations: continuous animal-tracking autofocus at 1/1000s or above, aperture between f/2.8 and f/5.6 for subject separation, golden hour light positioning, and 8 composition rules applied to trail terrain. Camera gear rated IPX4 or above, a mirrorless body with AI subject tracking, and a 70–200mm f/2.8 primary lens provide the technical platform. Training the dog to hold position using the place and stay commands and photographing after 20 to 40 minutes of trail activity produces the relaxed, engaged body language that defines high-quality dog trekking photography.
Related guides
- Bikejoring with Dogs: 5 Key Skills, Best Breeds, and a Complete Setup Guide
- Camping with Dogs: 8 Essential Gear Items, Safety Rules, and Campsite Guide
- Canicross Beginner Guide: 8 Training Steps, Essential Gear, and Safety Rules

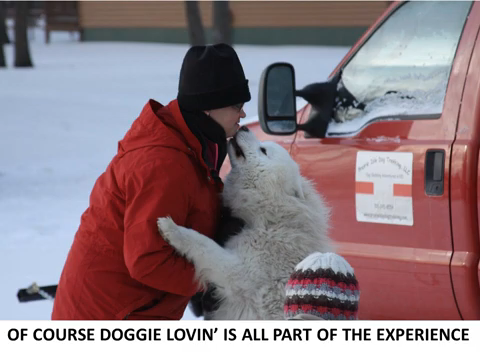
Helen L. Corlew runs a team of Samoyeds, Alaskan malamutes and Alaskan huskies. I am a Tellington TTouch practitioner and use this mode of work with training and living with my dogs.
Helen Corlew founded Prairie Isle Dog Trekking in Petersburg, North Dakota in 2010, and has spent the fifteen years since doing something most people only read about: teaching real dog sledding on real prairie terrain, at the edge of a landscape that doesn’t apologize for being difficult.
She is not a weekend enthusiast. She harnesses working dogs in January cold, trains handlers who have never touched a sled, and has built one of the only hands-on mushing education programs on the Northern Great Plains — from a single address on Highway 2, with no marketing budget and no shortcuts.
Her writing on Prairie Isle Dog Trekking reflects the same philosophy. Whether she is covering trail safety across the Rockies, breed behavior in extreme conditions, or what it actually takes to trek with a dog in the Alps, Helen writes from the position of someone who has done the work before writing the sentence.
She lives and runs dogs in Nelson County, North Dakota.
Kindly follow me on Social Media!


