

How to Walk the Dog with a Yo-Yo: 5-Step Trick Tutorial for Beginners
Walking the dog with a yo-yo means throwing a Sleeper, lowering the spinning yo-yo to the floor, and letting it roll forward before tugging it back to your hand. Walk the Dog is the most recognised yo-yo trick in the world. It requires 1 foundational skill: a strong, steady Sleeper.
What Is the Walk the Dog Yo-Yo Trick?
Walk the Dog is a yo-yo trick in which the spinning yo-yo touches the floor and rolls forward like a dog on a lead before returning to the thrower’s hand. The trick is classified as a beginner-level trick but requires a consistent Sleeper throw and enough spin time to complete the roll.
Walk the Dog is the first trick most people ask a yo-yo player to perform. It is built on a single prerequisite: the ability to throw a straight, stable Sleeper that spins for at least 3 to 5 seconds at the end of the string.
What Yo-Yo Do You Need to Walk the Dog?
A responsive yo-yo is the correct choice for Walk the Dog. Responsive means the yo-yo returns to the hand with a firm tug on the string. This is the standard behaviour of beginner-level yo-yos.
2 types of yo-yo are available:
- Responsive: Returns with a tug. Correct for Walk the Dog and all beginner tricks. Plastic responsive yo-yos are the most practical choice for learners.
- Unresponsive: Requires a special technique called a bind to return. Not suitable for Walk the Dog as a starting point.
A plastic yo-yo is recommended over metal for early practice. Plastic is lighter, less likely to dent on floor contact, and less risky if the yo-yo swings back unpredictably during learning.
String length is also important. When the yo-yo rests on the floor, the string should reach from the ground to approximately the thrower’s belly button. A string that is too long causes the yo-yo to make heavy floor contact. A string that is too short does not give enough room to lower it to the ground cleanly.
What Surface Is Best for Walk the Dog?
A smooth, hard floor produces the best results for Walk the Dog. Suitable surfaces include hardwood, smooth concrete, and short-pile indoor carpet.
| Surface | Result |
|---|---|
| Hardwood or laminate | Best. Yo-yo rolls fast and far. |
| Smooth concrete | Good. Slightly more friction than hardwood. |
| Short-pile carpet | Acceptable. Slows spin but workable. |
| Thick carpet | Poor. Grab the yo-yo and stops the roll. |
| Rough concrete or gravel | Avoid. Scratches the yo-yo rims and kills spin instantly. |
| Wet or damp surface | Avoid. Stops the yo-yo and damages the bearing. |
For indoor practice, a hallway or kitchen floor is ideal. For outdoor practice, a flat concrete path or basketball court works well. Clear at least 1 metre of space in front of you before throwing.
How to Do the Walk the Dog Yo-Yo Trick
Walk the Dog is completed in 5 steps: grip, throw, stabilise, lower, walk, and return.
Step 1: Grip and Set Up
Loop the string around the middle finger of your throwing hand. The loop should sit at the base of the fingernail, not at the knuckle. A loop at the knuckle slips during the throw.
Hold the yo-yo in your palm with the string facing downward. Your palm faces upward at this stage. Check that the string is not tangled and that the yo-yo winds smoothly before throwing.
Step 2: Throw the Sleeper
The Sleeper is the foundation of Walk the Dog. A Sleeper is a throw that sends the yo-yo to the end of the string, where it spins without returning.
To throw the Sleeper:
- Raise your forearm so the yo-yo is level with your ear, palm facing inward.
- Extend your arm downward in a fast, firm motion, as if throwing a ball at the floor.
- As the yo-yo reaches the bottom of the string, rotate your wrist so your palm faces downward.
- The yo-yo should hang at the end of the string and spin in place.
A strong Sleeper requires a fast, committed throw. A slow or hesitant throw produces a yo-yo that returns immediately instead of sleeping.
Step 3: Stabilise the Spin
A wobbling yo-yo cannot walk the dog. Wobble, also called tilt, happens when the throw is not completely vertical. The yo-yo tilts to one side rather than spinning flat.
To correct wobble immediately after the throw, swing the throwing hand slightly in the direction of the tilt. A small nudge in the right direction straightens the spin within 1 to 2 seconds. Do not wait more than 2 seconds after the throw to correct it. Once the wobble becomes severe, the yo-yo will return on its own.
A straight, wobble-free Sleeper is the single most important skill to develop before attempting Walk the Dog. Practice the Sleeper alone until the yo-yo spins flat and steady for at least 4 seconds before moving to the next step.
Step 4: Lower the Yo-Yo to the Floor
Lower the spinning yo-yo to the floor by slowly bringing your throwing hand downward toward the ground. The motion is slow and controlled, not a drop.
The yo-yo should make contact with the floor gently. Hard contact kills spin immediately. The correct contact feels like the yo-yo is barely grazing the surface before its spin carries it forward.
Lower your hand to approximately knee height, then bring it down a further 20 to 30 centimetres until the yo-yo touches the floor. Keep your arm relaxed throughout. A tense arm transmits shaking through the string and destabilises the spin.
Step 5: Walk It Forward and Return
Once the yo-yo touches the floor, its spin carries it forward. Allow it to roll ahead of you for 15 to 30 centimetres, then tug the string upward firmly to return it to your hand.
The tug must be firm and direct. A weak tug on a low-spin yo-yo will not bring it back. If the yo-yo has lost too much spin by the time it finishes rolling, it will not return regardless of how hard you tug. The solution is a stronger initial throw.
At competitions, the standard Walk the Dog distance is approximately 30 centimetres, from the back of the foot to the front. For casual performance, a longer walk of 50 to 60 centimetres looks more impressive but requires a significantly stronger throw to maintain enough spin for the return.
Why Does My Yo-Yo Wobble When I Walk the Dog?
A wobbling yo-yo is caused by a throw that is not completely vertical. 3 specific throwing errors produce wobble:
- Releasing at the wrong angle: The wrist rotates too early or too late during the throw, sending the yo-yo off-axis.
- Inconsistent string tension: Old or twisted string causes the yo-yo to spin unevenly.
- Throwing across the body: The throw moves diagonally rather than straight down, producing tilt.
The fix for all 3 errors is the same: throw straight down, directly in front of the body, with a smooth wrist rotation at the bottom of the motion. Practise in front of a mirror to check that the throw is vertical.
What Are the Walk the Dog Variations?
Walk the Dog has 4 recognised variations that build on the base trick.
| Variation | Description | Difficulty |
|---|---|---|
| The Creeper | Thrower crouches low and lets the yo-yo walk close to the floor, then returns from a low position | Beginner |
| Walk the Dog Between the Legs | The yo-yo is walked between the thrower’s feet rather than in front | Beginner to intermediate |
| Walk the Dog Around the Park | A gentle string nudge reverses the yo-yo’s direction mid-walk | Intermediate |
| Walk the Cat (Naughty Dog) | The yo-yo walks backward away from the thrower rather than forward | Intermediate |
Walk the Dog Around the Park requires the ability to nudge the string left or right without triggering the yo-yo’s return. Too much pull brings it straight back. The correct motion is a minimal sideways redirect that changes the roll direction without interrupting the spin.
How Long Does It Take to Learn Walk the Dog?
Most beginners can complete Walk the Dog within 1 to 3 practice sessions once the Sleeper is consistent. The Sleeper itself takes most learners 1 to 2 hours of dedicated practice to throw steadily.
The 3 skills required to land Walk the Dog reliably are:
- A Sleeper that spins for at least 4 seconds with no wobble.
- A controlled, gentle floor contact that does not kill the spin.
- A firm, correctly timed tug that returns the yo-yo before the spin runs out.
Practicing each of the 3 skills separately before combining them into the full trick reduces total learning time significantly.
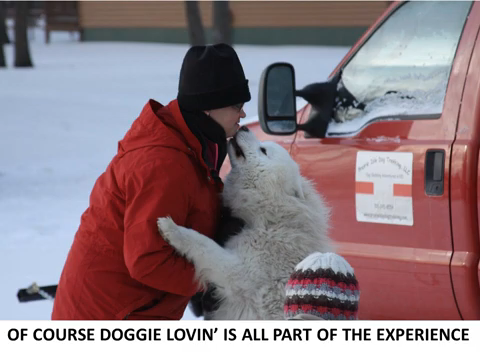
Helen L. Corlew runs a team of Samoyeds, Alaskan malamutes and Alaskan huskies. I am a Tellington TTouch practitioner and use this mode of work with training and living with my dogs.
Helen Corlew founded Prairie Isle Dog Trekking in Petersburg, North Dakota in 2010, and has spent the fifteen years since doing something most people only read about: teaching real dog sledding on real prairie terrain, at the edge of a landscape that doesn’t apologize for being difficult.
She is not a weekend enthusiast. She harnesses working dogs in January cold, trains handlers who have never touched a sled, and has built one of the only hands-on mushing education programs on the Northern Great Plains — from a single address on Highway 2, with no marketing budget and no shortcuts.
Her writing on Prairie Isle Dog Trekking reflects the same philosophy. Whether she is covering trail safety across the Rockies, breed behavior in extreme conditions, or what it actually takes to trek with a dog in the Alps, Helen writes from the position of someone who has done the work before writing the sentence.
She lives and runs dogs in Nelson County, North Dakota.
Kindly follow me on Social Media!
